Email address
This is a common question from Google Forms users who need to reply to the people who fill their form. One typo makes that impossible. A plain question accepts whatever they type and you only find out when your message bounces. Google Forms has a Collect email addresses option, but email is always the first field, you cannot make it optional and you cannot change its label. With Formfacade, you can add an email address question with a validation, anywhere in the form and your users have to enter a valid address before they submit. Even better, you can name that question your own way and make it optional.
Let's start. Create your form and follow the steps below.
There are two ways to collect email address in Google Forms. You can enable the "Collect email addresses" option in the Settings or add a short answer question with email address response validation.
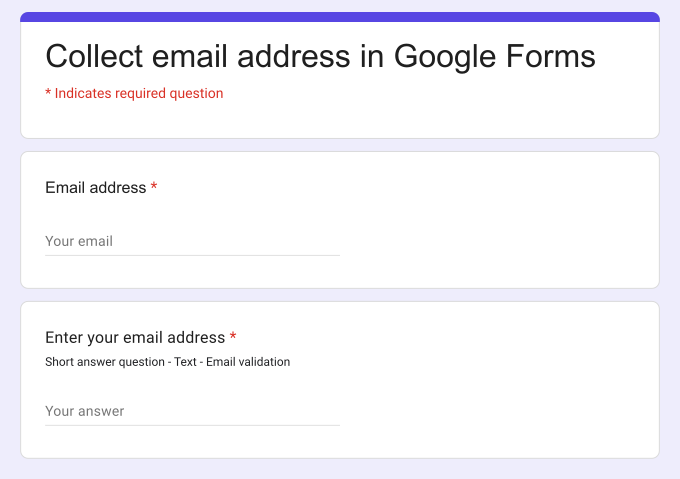
- On the page that opens, name your form, click Build form and click Proceed. It can take about a minute.
- You will land on the form's "Preview" tab.
- Click on "Edit" tab

Your new form may already have an Email question or one in each section. If you do not want it asked twice, click on that question and click on the trash icon.
Option #1: Enable collect email addresses
You can enable the "Collect email addresses" option in form settings to add email address field in your Google Forms. Please follow the instructions below.
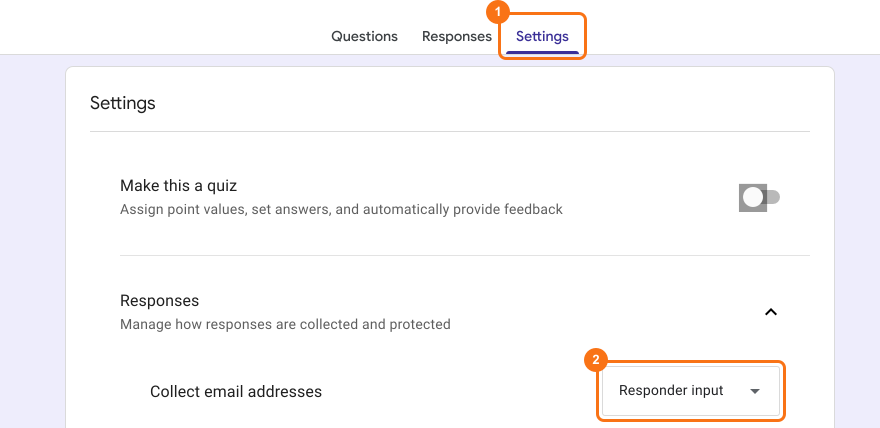
This option is only in Google Forms. Click on the form's title, click on the ⚙️ icon, select the "Advanced" tab and click Launch next to "Edit this form with Google Forms". Google Forms will open in a new tab. In Google Forms, click on the Settings tab. Settings screen will be displayed. Click on Responses and select "Responder input" for "Collect email addresses" option as shown below.
Google Form automatically adds email address as the first field in the form as shown below.
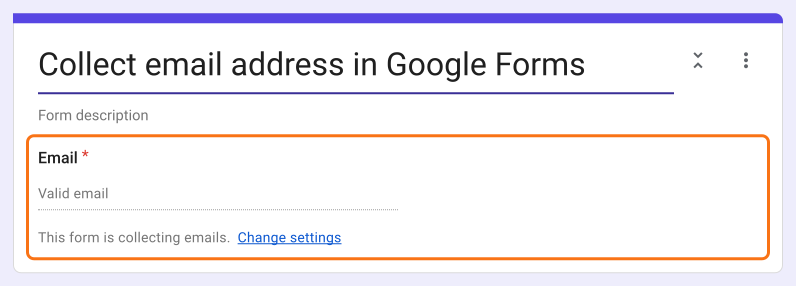
- Open the form's "Edit" tab again, so that your form picks up the change. If you do not see it, wait a few seconds and reload the page. It shows as Email Address at the top of the form.
Limitations
- Email will always be the first field in the form.
- You cannot make Email as an optional field.
- You cannot change the field label. It will always be displayed as Email address.
Important
- If you are using Google Forms and want to send a copy of the response to the form respondent by email, you must use Collect email addresses option with "Send responders a copy of their response" enabled.
- If you are using Formfacade to customize your Google Forms, you must not enable "Send responders a copy of their response" to send confirmation emails (Learn why). You can use our Formfacade - Email notification add-on to send confirmation emails.
Option #2: Short answer question with response validation
You can add a short answer question with email address response validation to accept valid email address. This gives you more flexibility than the collect email address option. You can add this question anywhere in the form, enter the desired field label and make this as an optional or required question. Please follow the instructions below.
Add a short answer question by clicking on the + icon in the toolbar on the right and enter your question. Click on the ⚙️ icon at the bottom right of the question, select the "Answer" tab and click Configure under Validation.
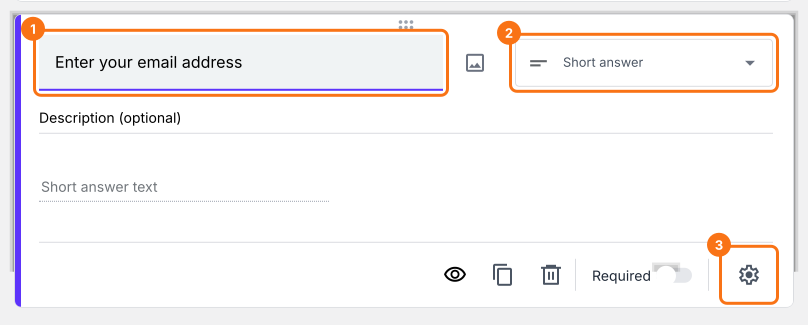
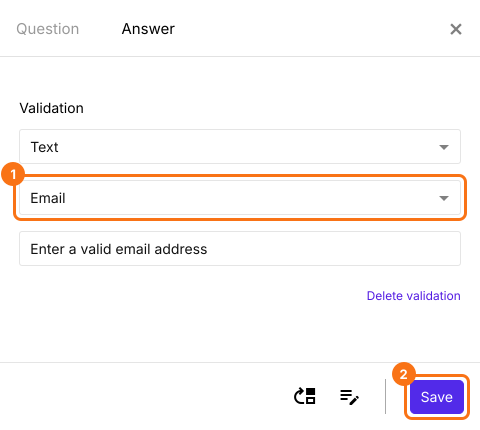
Select Text and Email to add the validation to check the email address format. If required, add a custom error message. To make this a mandatory question, tick Mark this as required field on the Question tab. Click Save.
Summary
If you need a valid email address from your users, a plain question will accept whatever they type. With Formfacade, you can add a short answer question with email response validation or enable the "Collect email addresses" option in Google Forms. Create your form and complete the steps above.
Last updated: