How to add your logo to Google Forms?
"high quality .jpg image at 800 x 200 px, but it still comes out pixellated"- Google Docs Editors Community
This is a common problem for Google Forms users and 1,535 people on Google's forum have reported it. For example, if you're about to send a form to your customers, it has to look like it comes from your business. Google Forms lets you add a header image, so you make a sharp .jpg at 800 x 200 and Google fits it into its own header. Your logo comes out pixellated and cut off. With Formfacade, you can add your logo as it is and your customers will see it sharp at the top of your form, with your business name beside it. Even better, the form will have your own branding instead of Google's, but the responses will be collected on your Google Forms.
Let's start. Create your form and follow the steps below.
1. Open the Preview tab
On the page that opens, name your form, click Build form and click Proceed. It can take about a minute. You will land on the form's Preview tab.

2. Add your logo and business name
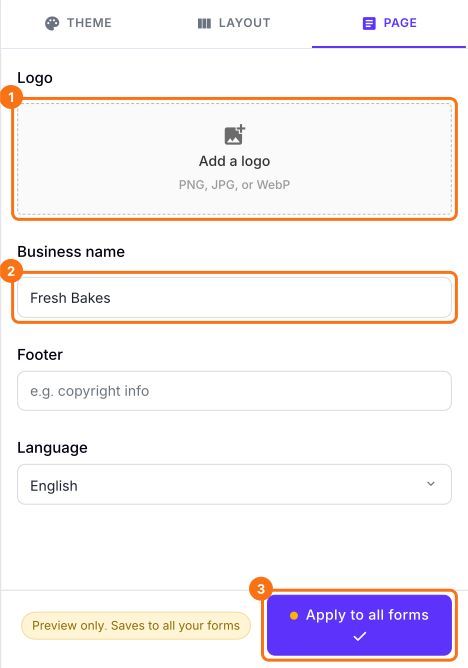
Click PAGE, then Add a logo and choose your logo as it is, with no need to make it 800 x 200. Type your name under Business name and click Apply to all forms, which puts this logo and name on every live form on your account, not only this one.
3. See your logo on your form
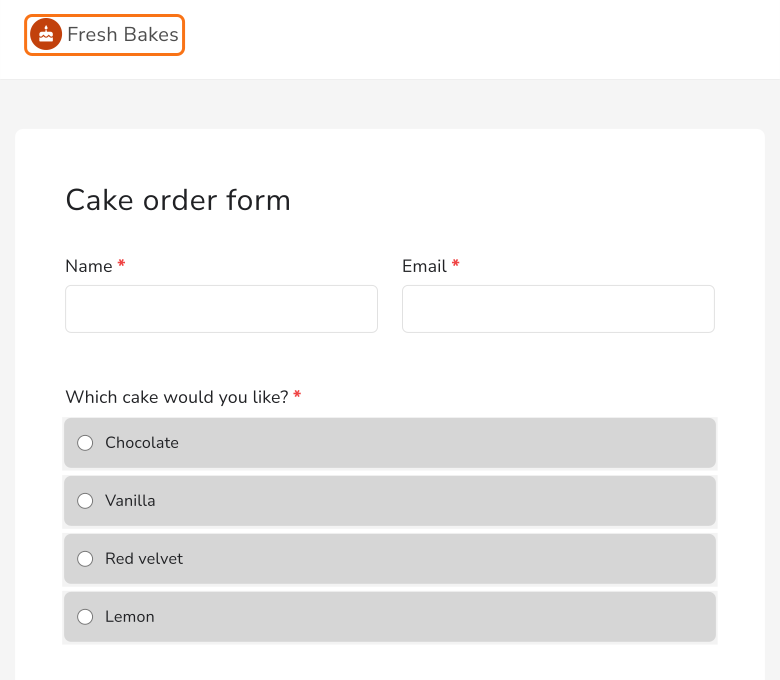
Open SHARE and click Open. Your logo keeps its shape at the top of your form, beside your business name.
Summary
If your form has to look like it comes from your business, a logo in Google's header image comes out pixellated and cut off. With Formfacade, you add your logo and business name and your logo shows sharp at the top of your form. Create your form and complete the steps above.
Last updated: